| Converting a Quake 2 Player Model To Kingpin by Syl^cs. | ||||||||||||||||||||||||||||||||||||||||||||||||||||||||||||||||||||||||||||||||||||||||||||||||||||||||||||||||||||||||||||||||||||||||||||
|
Welcome to my first tutorial, expect some bad Canadian grammar and a few spelling mistakes ;-) I learned the basics to Kingpin modelling from Evilbunnys Kingpin Modeller Resource Site's tutorials a little over a year ago, and though his site got me started, the tutorials were very incomplete and left far too many questions to be answered, so I hope to avoid those kind of issues by giving a COMPLETE explaination of how to get your model in the game with as little confusion as possible. You do not need to have any previous modelling experience or knowledge to follow my tutorial and get your own model converted and in the game :) Heck i had no clue when i started and thought it may be too difficult, but thanks to Tical and the neat little tools he makes, making models today is far easier than it was when i begun. And so we start: To begin with the programs we will be using in this tutorial are Quake 2 Modeller (download here), Ticals MD2- MDX Converter (download here) and any paint program that can convert an 8 bit pcx to 24 bit tga format, one is Wally or GIMP (those ones are free otherwise use adobe photoshop) and of course youll need Kingpin :) The first thing you need to do if youve never used q2mdl before is to setup the directory in the settings, goto options --> configure.. and then goto the directory tab. Change it so it looks like this, or your respective directory: 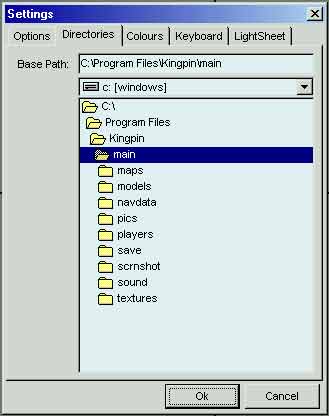
This must be changed to this as md2 models store the texture directory location information in the file based on this location. Next Download this file Modelfix.md2 and put in my documents or something :-p FREDZ says: here is bit the problem polycount doesn't excist anymore thats why also these tutorials are gone :( Anyway, you could download Quake 2 Models now from -=NotriX=- Best Quake2 models, skins, and sounds (New Link) Ok, now goto someplace like Polycount(Death link) and goto the Quake 2 models section, pick out the one you want, keep in mind the ones that have already been done. Most models can be found at Kingpin.info For my 6th Convertion (uhg) I've chosen Velvet Jackson by Dwayne Douglass aka. Oddjob , who in the readme states he has no problem with anyone disecting his model, he's created a cool model so heres credit to him Velvet Jackson by Dwayne Douglass aka. Oddjob email - oddjob1138@earthlink.net 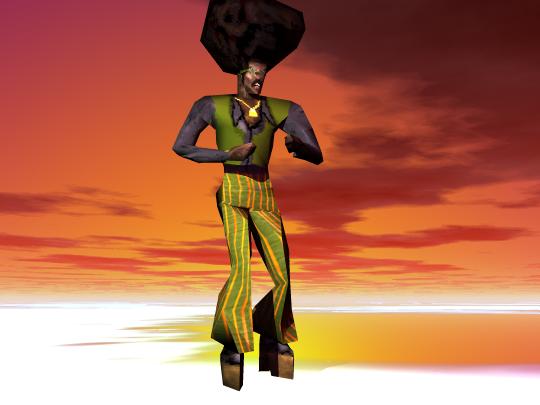
The Grueling Part: Animation Movement Open up quake 2 modeller, open that Modelfix.md2 file we downloaded earlier. Next goto file--> merge and goto your chosen models directory where there should be a file called tris.md2, and choose that. Again choose file --> merge and this time choose weapon.md2. Now we have the model converted to the proper length of frames for kingpin player models.Now Kingpin has almost twice as many frames of animation than quake 2 so what we need to do is move the animations around, basically by cutting and pasting individual frames. Now to ensure that we dont loose any in the moving process we will start halfway at frame 203 run_melee_01. 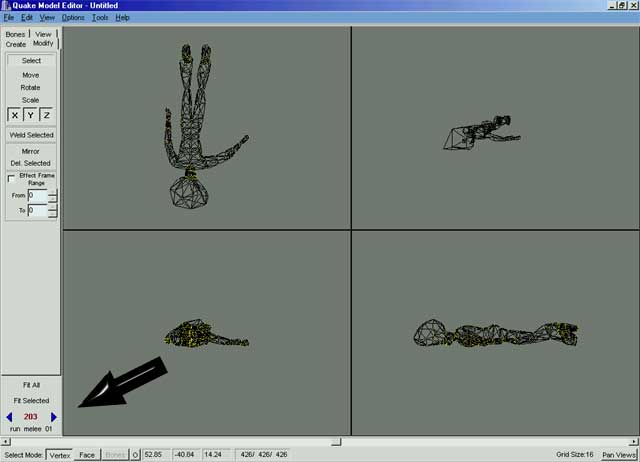
SAVE IT At this point it looks like the model is just dead and non moving during the whole run_melee sequence. This is because the last frame in a quake 2 model is the end of one of the deaths, so when we merged it with modelfix.md2 we expanded the model by about twice as many frames and it used the last frame of the quake 2 animations to fill in the new frames. What we need to do is goto edit --> select all, then copy the run animations frame by frame , by going to frame 40, hit crtl c on your keyboard, goto frame 203 and hit ctrl v to paste, and answer yes to any questions it asks, From here: 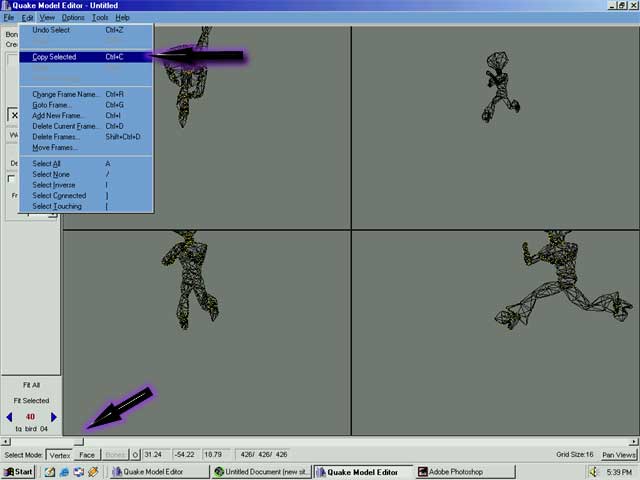
To here: 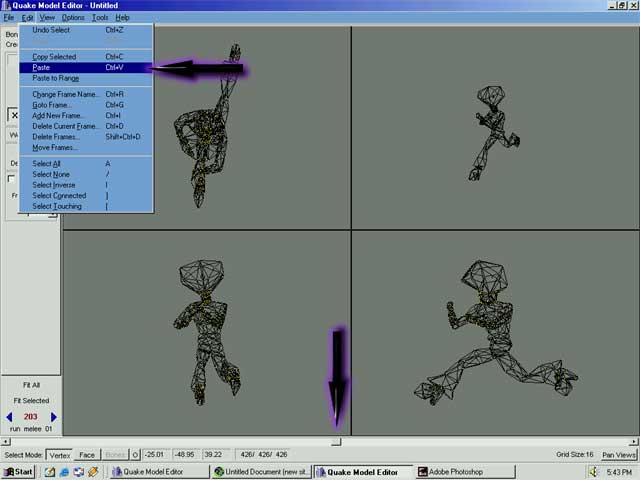
from frame 41 to frame 204, frame 42 to 205, etc... SAVE IT Next we come to run_guns_dn_01 (it says the frame name in the bottom left corner) Incase your wondering what some of those frame names mean heres the list:
Basically it means running with guns down, since in quake 2 there is no indiference between running with guns up or down we will just use the run animation frames. To save time you can just copy the 6 frames you just used for run_melee. SAVE IT Next we come to jump_01, this is pretty straight forward, jump in the quake 2 animations starts at frame 66,copy and paste as before.( I usually keep another copy of q2mdl open with the tris.md2 opened by itself so i can go back and forth to see the frame names on the original) SAVE IT Next is climb_loop_01, now in quake 2 there is no climb animation, so either you spend some hours moving stuff around, or you can use the run animation like I do ;-P Now the climb_loop needs more than 6 frames, when you get to 6 just start from using the first frame again, like this - 1-1, 2-2, 3-3. 4-4, 5-5. 6-6, 1-7. 2-8... etc SAVE IT Now is death1_01, death 1 in quake 2 starts at frame 179, same as before copy and paste verts over frames. SAVE IT At this point I think you can do the rest of the animations without me, just remember there are some differences, in the quake 2 animations you can use flip, salute, flipoff, taunt, wave, and point animations for the kingpin taunt animations tg_bird, tg_crch_grab, and tg_chin_flip, just pick which ever you think suits your model the best :) AND REMEMBER TO SAVE LOTS, q2mdl is the most unstable program in the world :-( Ok.... 1 1/2 hours later im all done the animation movement(my first took 4 hours!, you get faster ;-) . Now our model is fully animated with one weapon for kingpin. Now we need to rescale the model because quake 2 models are almost 1/2 as big as in kinpin. First on the menu bar on the left checkmark Effect Frame Range then choose, from 0 to 385 in the second box. Now download and merge this file Now your screen should look like this: 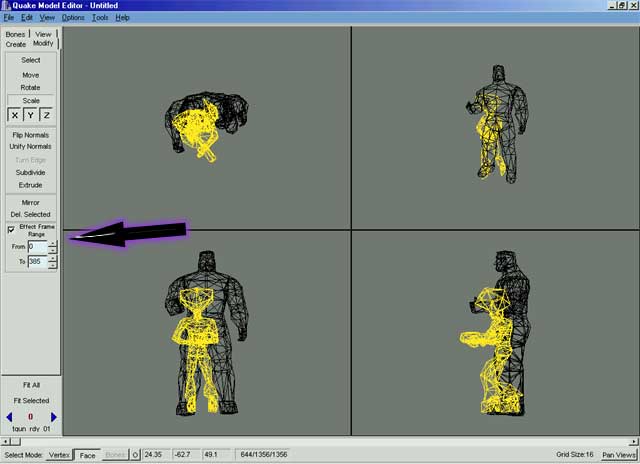
Question: Why is your model highlighted like that? Answer: If you look at the bottom of that last screenie youll notice at the bottom I have the Face button selected. When you merge the thug.md2 file the thug becomes selected, so he will look all yellow (thats my highlighted faces color) now to switch back to your model + his gun choose edit --> select inverse and your model will become selected. Now click the scale button as I have in that last pic on the left menu bar, and SLOWLY (why say slowly?, yet again q2mdl is the most unstable program in the world, if youve been running it for a while, and try to scale him quickly you will get a Float Point overflow or any other of the numerous errors this thing spits out ) scale the model to the size you want, with respect to the size of the thug. When your done, choose edit --> select inverse again, and hit delete, answer yes to any questions it asks and you will be left with just your model, and his gun, as in this pic: After scaling : 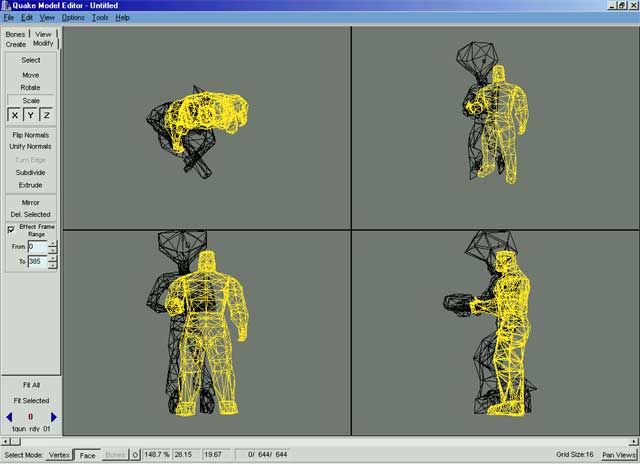
After deleting thug: 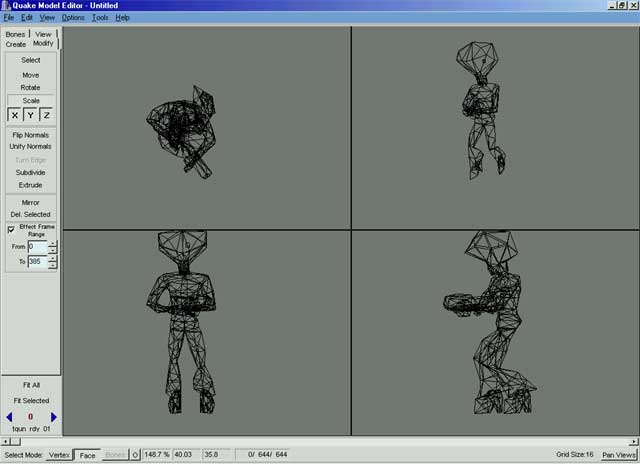
Sweet, hes done. :) Textures: Ok goto your image editing program and open up weapon.pcx and the texture for your model, you know what it is :-P convert them to 24 bit color, and save them as tga format. (NOTE. The methods of converting a texture from 8bit pcs to 24 bit tga are completely different depending on the software and it would take me a day just to explain the differences, this is why i wont be walking you through that, if you get stuck, ask a friend, search on www.google.com, or as a last resort email me) Now create a new folder for all the final stuff inside your kingpin folder in main/players/male or main/players/female, copy those 2 textures there, plus the original 2 pcx files. Now rename his body texture to body_001.tga and make 2 copys of it, name those head_001, and legs_001. The weapon texture can be left as weapon.tga.. Ok textures all ready :) Getting him/her in Kingpin: Now open up quake 2 modeller again, and load up your model. Now we're ready to go check it out in the game, but first we need to re-seperate the body from the gun. So click the FACE button on the bottom, and in one of the views drag a box around the tip of the gun, being carefull not to select any of the models body, so that your screen looks like this : 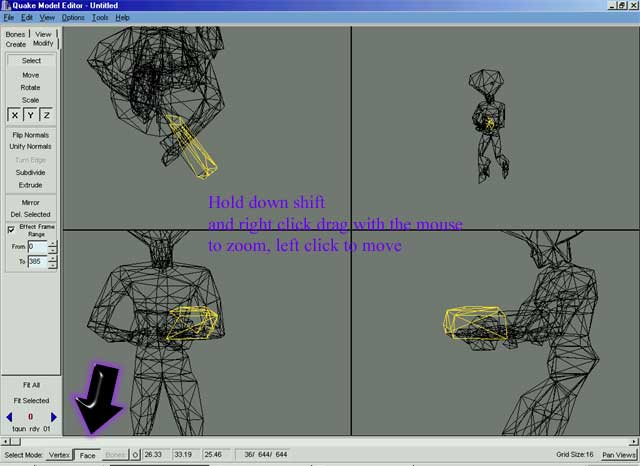
Now that you have just a part of the gun's faces selected, goto EDIT --> SELECT CONNECTED, or ] on the keyboard. This will select the rest of the gun for you. If after you hit this all of your model becomes selected including the body, then you have selected part of his body, so hit EDIT --> SELECT NONE, and select the tip of the gun again, and try again... The Carefull Part: (Dont vere off course, or youll loose it ;-) Ok now that we have the gun selected, we can hit delete. Answer yes to any questions, and we are left with just the models body. Now MAKE SURE FACE button is selected at the bottom, click VIEW --> SKINS, now in this new window click FILE --> IMPORT --> SKIN IMAGE..., and goto your models directory, and choose your models body texture. Now your screen should look like this: (or close to it ;) 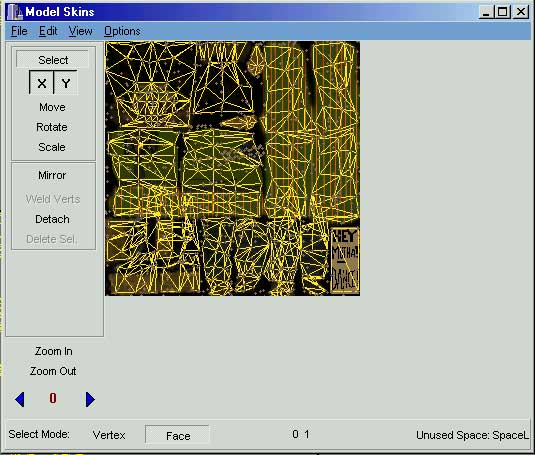
Now close that window, goto FILE --> EXPORT --> Export to MD2... Ok, this is the confusing part for most first timers, there are going to be 2 windows popup. The first asks where you want to save the model to, so goto your kingpin folder, into your models folder, and save this part named BODY (without caps), when you hit save another window will popup, this window is asking for the location of the texture, since in Kingpin the engine itself decides where the textures are you can just type NONE in the name bar and hit open, and the body part is done. Now before you do ANYTHING else, goto EDIT --> UNDO, you may have to do this twice, until the gun that you deleted earlier comes back, now you should see the gun back in his/her hands highlighed again. Now goto EDIT --> SELECT INVERSE, and the body should become selected, now hit delete on the keyboard once and answer yes to any questions it asks. Now open that skin window again by going to VIEW --> SKINS and this time, import the weapon.pcx file thats in your models directory, and answer yes to any questions it asks about "Bitmaps width and height are not the same as the current skin, continue?" Ok now close the skin window again, and again goto FILE --> EXPORT --> Export to MD2... and this time, in the first window, goto your models directory ex. players/male_velvet for mine, and save it as w_shotgun.md2. In the second window it asks for the location of the texture, now this time we NEED to tell the game where the skin is, so we again goto our models directory, and this time we type in the full name of the texture including the extension (ex so you type in weapon.tga including the TGA part!!) as shown here: 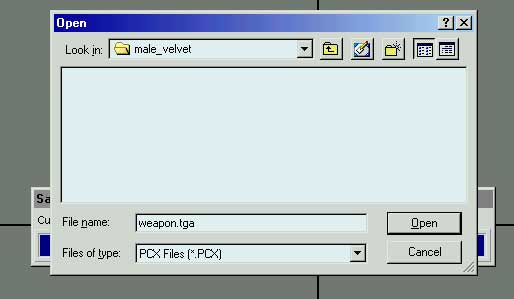
Ok, all done, now goto your models directory, make 2 copys of that body.md2 we just made, and rename them head.md2 and legs.md2, also make a few copys of the w_shotgun.md2 you just made, and rename them w_pipe, w_pistol, w_tommygun... etc, (you can find the names in the /players/thug folder for all of them for checking) Now open up that MD2-MDX converter program I got you to download at the top of this tutorial, and use it to convert each of the md2 files in your models directory one at a time ( this program is pretty straight forward and i dont think i need to walk you through it lol ) 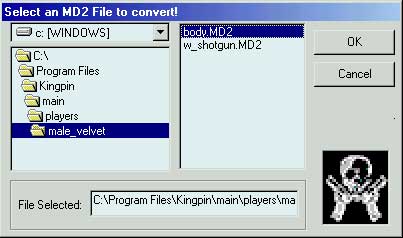
Whew, now we can open up Kingpin, and check out our newly completed model :) 
Now as you can tell from these 2 pics, my comp crashed in the middle of scaling it and i forgot LOL! 
If you have any questions, concerns, or points to add that may make this tutorial better please feel free to email it to me at : sylacs@telefraggednot.com |