|
Building Youre First Map by FREDZ. Version 1.0 |
|
In this tutorial i gone learn you how to make youre first map it gone a simple map just like map 187. But i gone call my map dm187 becouse every map you make needs a new name becouse it's a bit unhandy to deleted every time a map and reinstall it again so be aware when youre release youre map it doesn't got the same name as a other map. Also when you just let people look at youre map don't keep the same name just rename it fast to dm187_alpha1.bsp for example so people don't have to delete map again when you updated youre map again. But before we start mapping you need to learn a few basics about Radiant. Here i will show you some overview basic of naming in radiant: 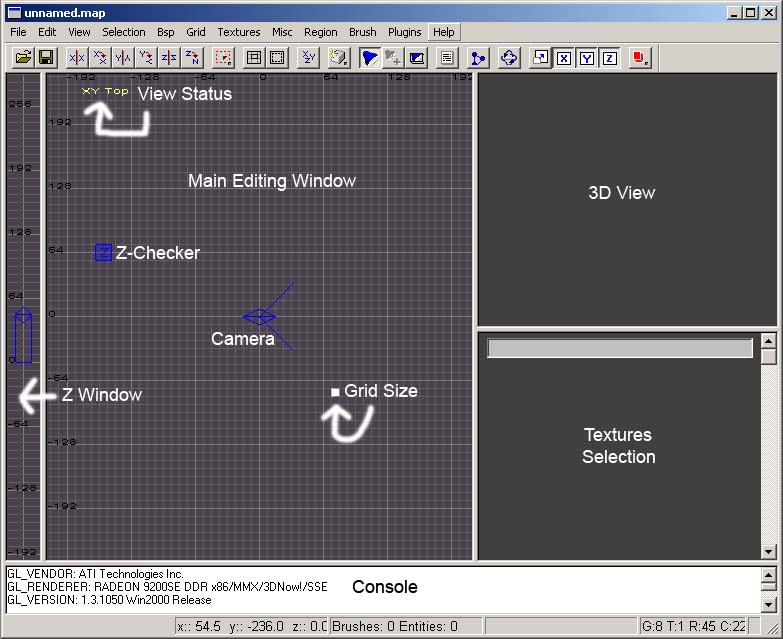
You can change the grid size with the keys 1-7 (you can also change grid under menu Grid|Grid4 and etc). For default you should use grid size 4 (If you start radiant it always will start also in grid size 4). If you hold down the right mouse button on the grid in main editing window you can move on the grid while moving youre mouse. With the arrow keys you can move your self under the 3D View or grid it's also called the camera in Radiant. 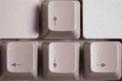
If you move the the arrow keys you will see that the camera moves. With the D and C key you move youre self up or down under 3D View. If you press the D key you will move up with camera. If you press the C key you will move down with camera. 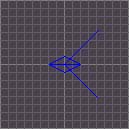
If you hold down Ctrl and then press the right mouse somewhere on the grid in main editing window the camera will move directly to it. For default when you start Radiant, Radiant start in Top View that is the XY Top View Status. You can change the View Status while holding down Ctrl and then press the Tab key. Do this a view times and you will see that the View Status are: 


Most of the mapping you will do in XY Top View but you gone use all 3 views allot so get back to the XY Top View Status. First we gone load a textures and start making youre first brush. To load a texture go to the menu Textures|Bricks or go to Textures|Load from List... and selected Bricks and press the LOAD button. You can also selected a diffrent texture submenu if you like, becouse i want to use the textures: bricks/c_sr_m2b. 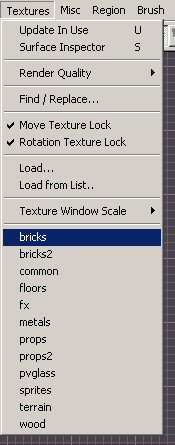
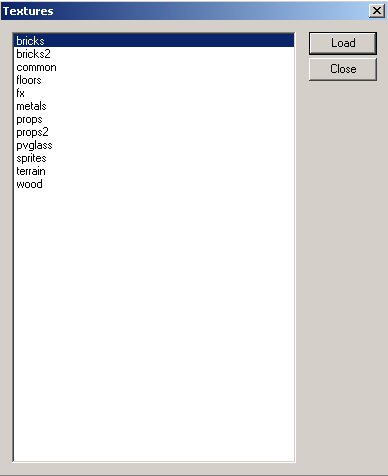
If you don't get a list of any textures and you din't setup kingpin.qe4 correct. You should then go back to the tutorial Setting Up Radiant. The you will a a menu to Load Textures. Just press the OK button. This will load all textures of bricks. 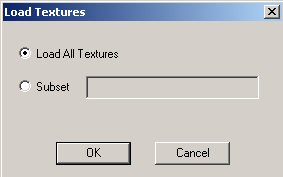
You will see them on the right side of youre screen in texture selection. To go fast to textures c_sr_m2b type above texture selection in the grey field c_sr_m2b. And click with youre left mouse on the texture. 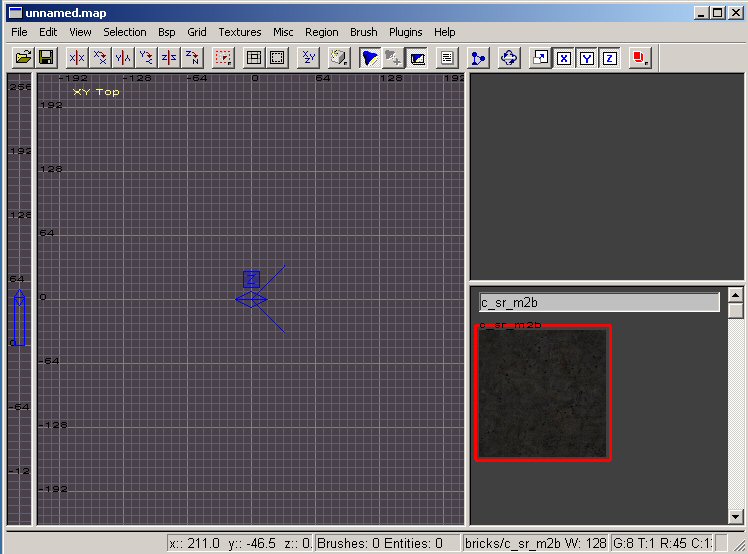
With the keys Delete and Insert you can zoom in and out on the grid in the main editing window. To zoom in on youre grid press the Delete key. To zoom out on youre grid press the Insert key. I need to zoom a bit out to make some bigger room on the grid becouse i want a big square. In the main editing window i click with left mouse and hold down and drag down the mouse so i get a square. You don't need exactly the same size square. If you find youre square big enough then release the mouse. Mine square is 512 units long, 512 units wide and 8 units high. 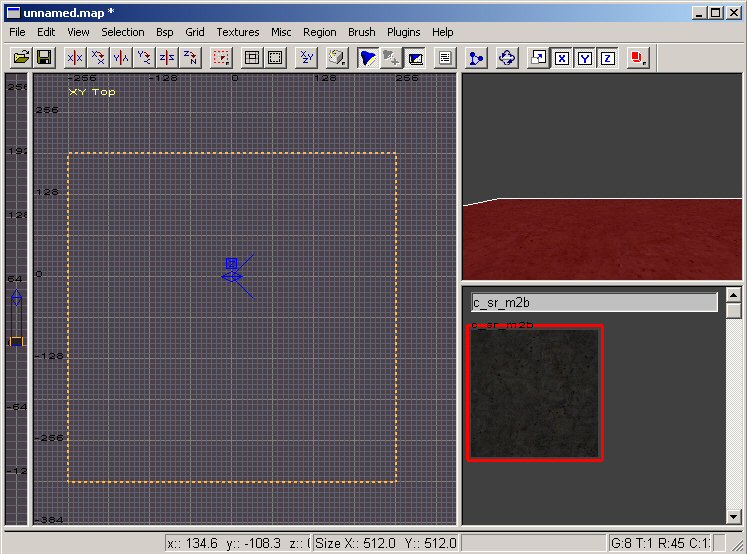
The square should be yellow indicated that it's selected. Now you builded youre first brush. If you don't like the brush press the Backspace key to deleted it and draw a new one. If youre brush is unselected hold down the Shift key and press the left mouse on the brush. Anyway i don't like the hight of the units it's only 8 units high. To change that i need to press down Ctrl+Tab to go to the XZ Front View Status. You will see there that it's only 8 units high. I want to be it at least 256 units high. Becouse a player is at least 72 units high a room should almost always higher then that. So make sure that youre brush is still selected and then hold down the left mouse and drag the brush up so it resize to 256 units (or any size you like). You can always do this resize to youre brushes when it's selected and in any view status. 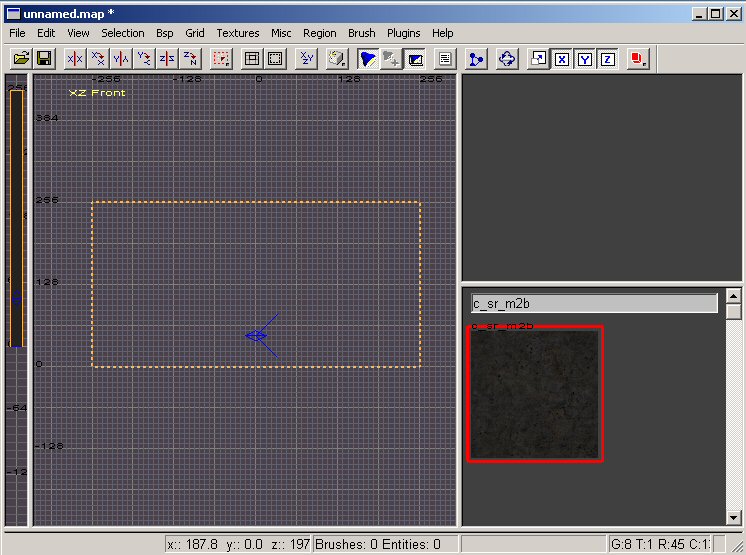
Now go back again to the XY Top View Status. Becouse i don't want the map be exactly like map 187. I gone change the Square to a Triangle. To change the Square to a Triangle i go the menu Brush|3 sides (or you can also press Ctrl+3). But you can also leave the Square as Square or change the brush to more size it's wot you like. 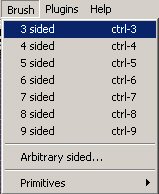
Now the brush is a Triangle i need to make the brush Hollow. So now you need to press the Hollow button you can also go to the menu Selection|CSG|Make Hollow. Only press 1 time the Hollow button otherwise you make to much brushes and maby will get in trouble at compiling. 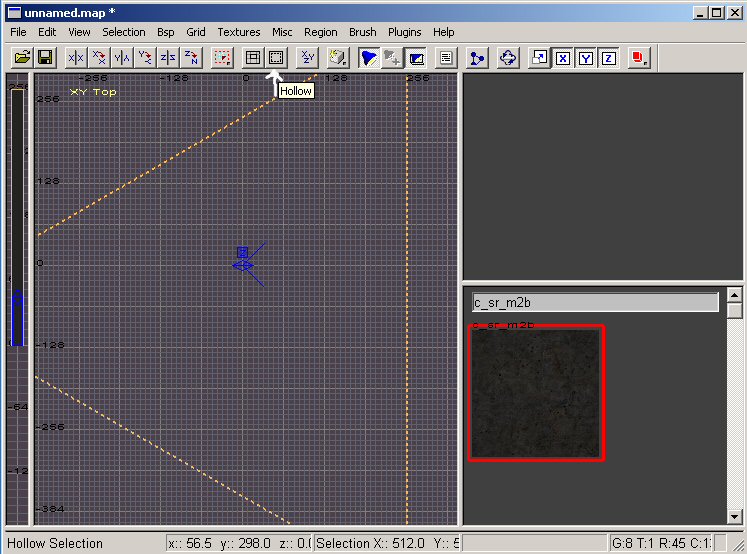
First we the unselected the hollow triangle brush by pressing the Esc key. Now the map is hollow and unselected it maby a good time to save the map. Go to menu File|Save as.. make sure youre a in the righ directory Kingpin\main\maps\ and give youre map a name. I gone save my map as dm187.map Now we saved map i want to change some wall textures. You will now see that in 3D View if youre in middle of youre triangle map the walls you build. Move arround with the arrow keys and move up and down with the d and c keys in the 3D view if you aren't there. The floor got now the right texture only i want to change the wall textures and the ceiling textures. First i gone change the wall textures. Move to a wall and then hold down the Shift key and press with youre left mouse on a wall. You will now see that the wall is selected try now to selected all side walls in 1 time while holding down shift key and moving around and press youre left mouse on the side walls. Now we got all side walls selected you can unrelease youre Shift key. Where now gone change now the texture i wan't to load remove the c_sr_m2b in the grey field above textures selection. I want to use the b_sr_v19 texture so i type that there now but you can also use a other textures if you like. 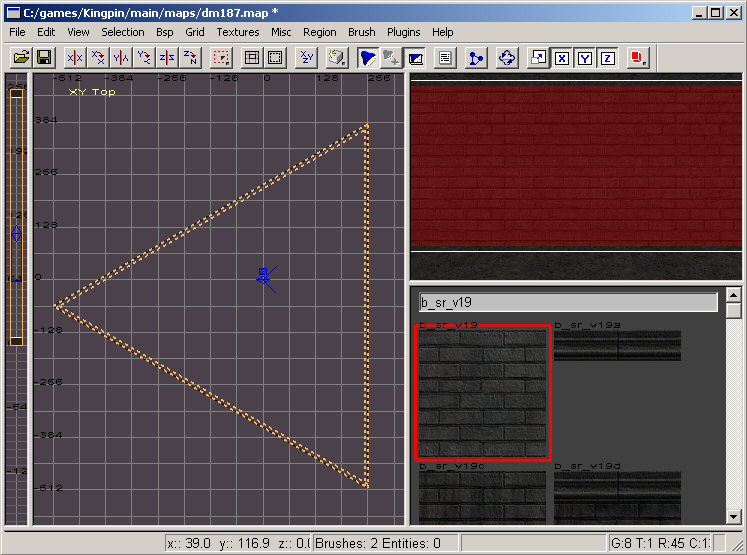
Now we got the wall changed textures we gone change the ceiling to a sky texture. Unselected all brushes by pressing the Esc key. We gone move arround again in the 3D view. But we can't look up or down yet. With the keys A and Z and you can look up and down with the camera. Press A to look up and press Z to look down. Go look up with the a key so you can selected now the ceiling brush. Now we got ceiling selected we gone load a diffrent texture out of textures menu. Go to Textures|Common and load all those textures. Remove the b_sr_v19 in grey field above textures selection. And type 0_sky1 selected that texture and we got now the ceiling changed into a sky texture. Unselected now ceiing brush now. Now we got all textures done we gone save the map again to make sure that nonning is going whrong. We gone put now entititees into map becouse without them we can't play map. To place a entitie in youre map Right click with youre mouse 1 time on the main editing window. A menu of entitities should popup. If you don't get a list of any entitities and you din't setup kingpin.def correct. You should then go back to the tutorial Setting Up Radiant. We should go to entitie info|info_player_deathmatch. 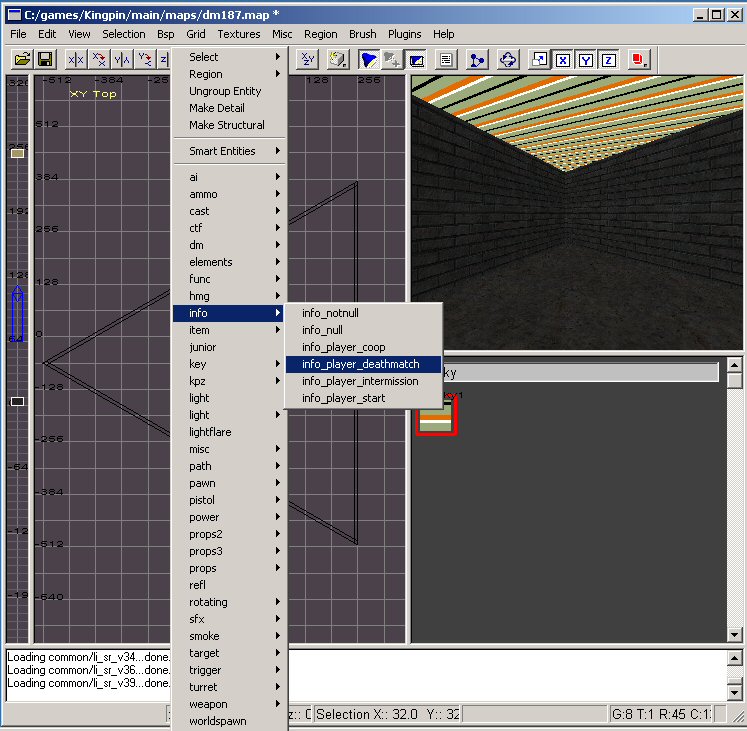
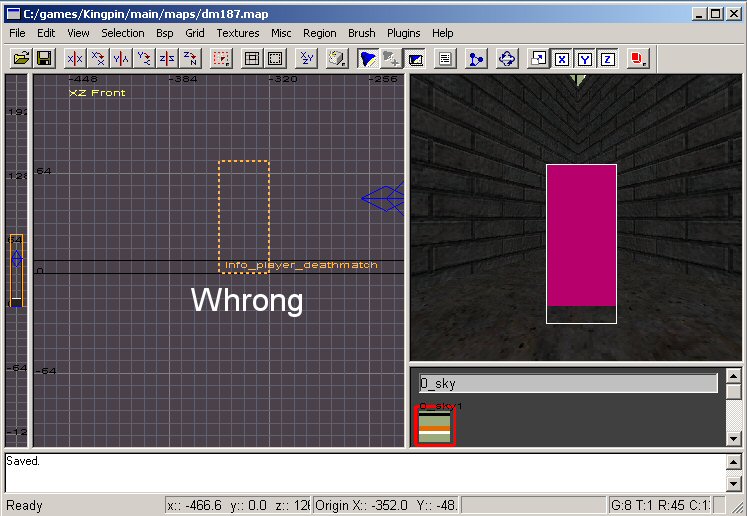
And left click with mouse to place it. So wot does info_player_deathmatch do? It's place there a player when it's start a map. But it also place a player there when you die or respawn. After you placed a info_player_deathmatch correctly you basicly you can compile map and load map into Kingpin. But if it's good you din't place info_player_deathmatch yet correctly. To make sure you place a entititie correctly you need to make sure you din't place it in to a brush(wall). Becouse every entitie that is places into a brush won't load in Kingpin. 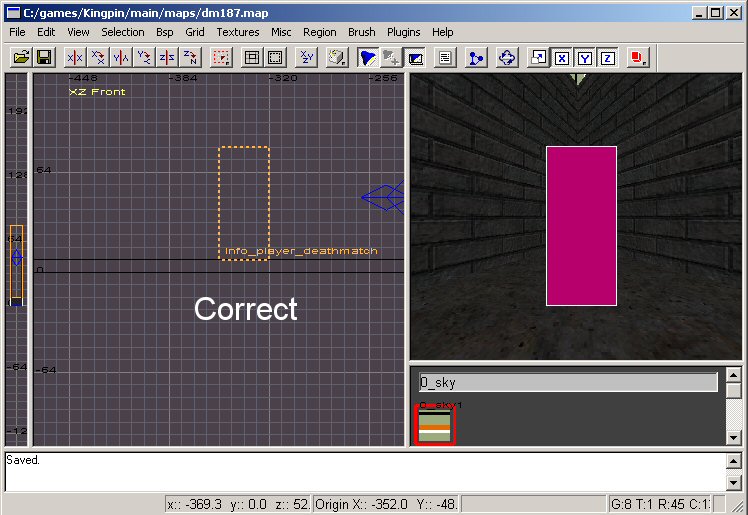
To unselected a entitie just press esc. To selected a entitie just press with youre left mouse on it, in main editing window or 3D view. To move a entitie press left mouse and drag it to somewhere. You need to make sure you placed the entitie into all View Status with Ctrl+Tab. If you placed now the info_player_deathmatch correctly we need to make sure we spawn into in the right way. Becouse you don't want players to be spawned in such way they always need to turn arround becouse there facing a wall. We need todo that in the entity dialog. To bring up the entity dialog you need to make sure youre got youre entitie "info_player_deathmatch" selected. This Entity dialog works for every entitie. To bring up the entity dialog just press n. To close entitie dialog just press n again. As shown in this screenshot: 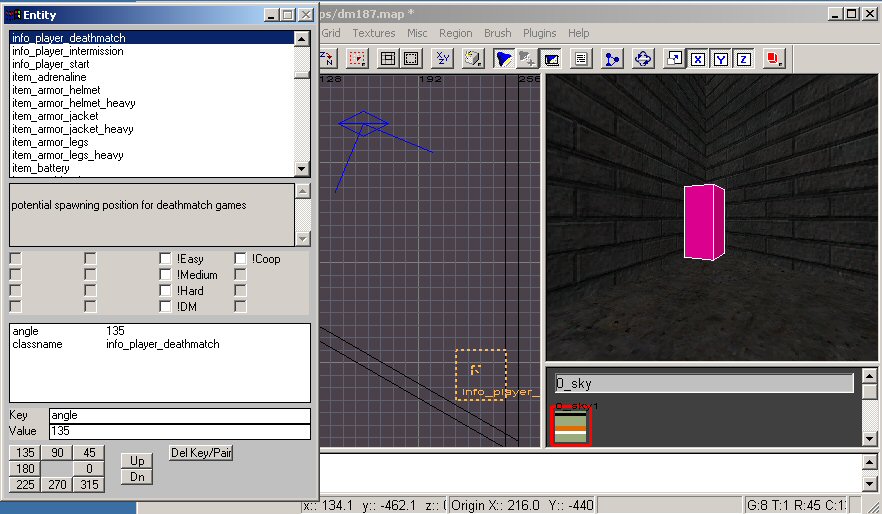
Normal a entitie will also will be places by kingpin as angle 0. This means like showing in the screenshot a player will spawn in the angle of the wall and then he should turn arround all the time. To fix that i just pressed the button 135 but it also possible to fill in key: angle and in value: 135 or a other value depence wot angle you like but angle 137 is also possible. After that i closed the entity dialong with n. To copy a entitie (or brush) just press the Space key and move it arround. The entinties you need to know for now becouse you need to put them now in youre in map: Under menu info: info_player_start (This is only used for single player as spawn playes for player.)(It could be handy to put 1 info_player_start into youre map if you can't load youre map in deathmatch.) info_player_coop (This is used for coopered mod but basicly it only used for quake 2 coop mod becouse kingpin coop mod use just 1 info_player_start.) info_player_deathmatch (You should now for wot it is anyway this is also used for bagman only in a bit diffrent way, you need to put so many of this in youre map how many players you want to have in youre map.) info_player_intermission (This will only load at the end of a deathmatch map when time or fraglimit is over.)(In most Kingpin mod's this won't work.) Under menu weapon: weapon_barmachinegun (This weapon never maked it to Kingpin and will be replaced by the grande launcher.) weapon_bazooka (It's the weapon rocket launcher.) weapon_crowbar (It's the weapon crowbar.) weapon_flamethrower (It's the weapon flame thrower.) weapon_grenadelauncher (It's the weapon grenade launcher.) weapon_heavymachinegun (It's the weapon heavy machine gun also called H.M.G.) weapon_pistol (It's the weapon pistol.) weapon_shotgun (It's the weapon shotgun.) weapon_spistol (It's the silencer mod for the pistol.) weapon tommygun (It's the weapon tommygun.) Under menu ammo: ammo_308 (It's 30 ammo for the weapon heavy machine gun also called H.M.G.) ammo_bullets (It's 10 clips of ammo for the weapon pistol or tommygun.) ammo_cylinder (It's 50 cylinder of ammo for the weapon tommygun or pistol.) ammo_flametank (It's 25 flame ammo for the weapon flame thrower.) ammo_grenades (It's 3 grenades for the weapon grenade launcher.) ammo_rockets (It's 5 rockets for the weapon rocket launcher.) ammo_shells (It's 10 shells for the weapon shotgun.) Under menu item: item_adrenaline (It's 100% health.) item_armor_helmet (It's 50% helmet armor.) item_armor_helmet_heavy (It's 100% helmet armor.) item_armor_jacket (It's 50% body armor.) item_armor_jacket_heavy (It's 100% body armor.) item_armor_legs (It's 50% leg armor.) item_armor_legs_heavy (It's 100% leg armor.) item_flashlight (It's a flashlight.) item_health_lg (It's 25 health.) item_health_sm (It's 15 health.) item_pack (It's will give you a item pack wot will upgrade the ammount of ammo you can carry and also give some ammo with it.) Under menu pistol: pistol_mod_damage (Mod for pistol gives more damage to pistol.) pistol_mod_reload (Mod for pistol gives you faster reload to pistol.) pistol_mod_rof (Mod for pistol gives you a better rate of fire to pistol.) hmg_mod_cooling (Mod for heavy machinge gun let you shoot hmg faster.) Under menu smoke: smoke_esm (Extra small smoke.) smoke_lg (Large smoke.) smoke_med (Medium smoke.) smoke_sm (Small smoke.) After you all done by puttin entities in youre map, youre map should look like something like this: 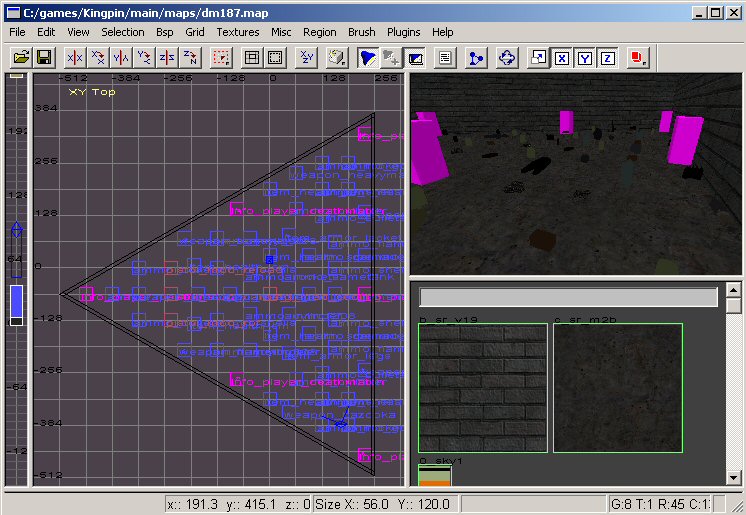
Also after you done allot of work it a good point to save youre work every time becouse you don't want to have things lost. It's almost all ready to compile youre map but we still need to do only 1 more thing and that is adding light to youre map. Light is also a entitie you place them the same way like all the other enties. Only you need to add also junior close to a light (junior is also a entitie). Wot juniors do is light up player models but also other weapons and items that lei on the ground. Most of the time you put light and juniors in mid air or close to the ceiling of youre map. We now gone put 1 light and 1 junior in the map, you can place more in youre map if you like but i like the idea to have just 1 light point like a sun. So i gone a light and junior in the middle of the map close to the ceiling. After i put a light in the map i press the n key to get the entity dialog. I fill at key: light and in value: 500 and press enter. The value says how strong the light is if you don't fill in a value it will be default light 300. 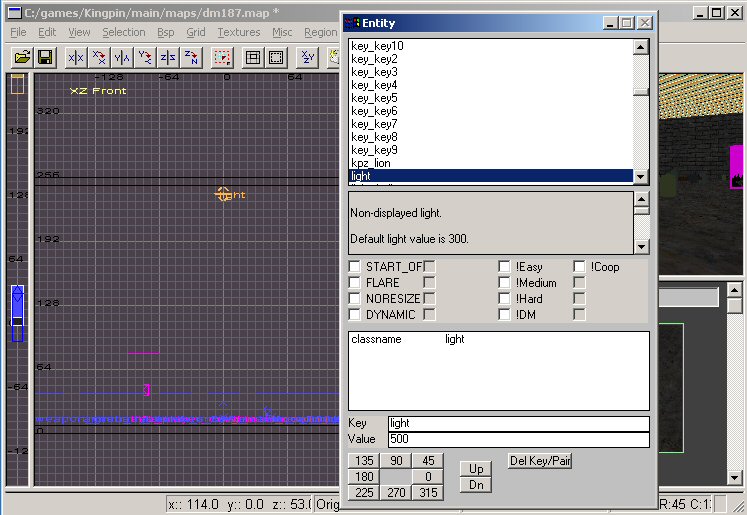
After i fill in the light value i bring down the entity dialog with n. Now i want the light have a yellow color but you can choose any color you like. I still have the light selected and i press the k key a color selection will popup i choose with mouse a yellow color and press the OK button with mouse. Color selection will only work for lights and juniors. 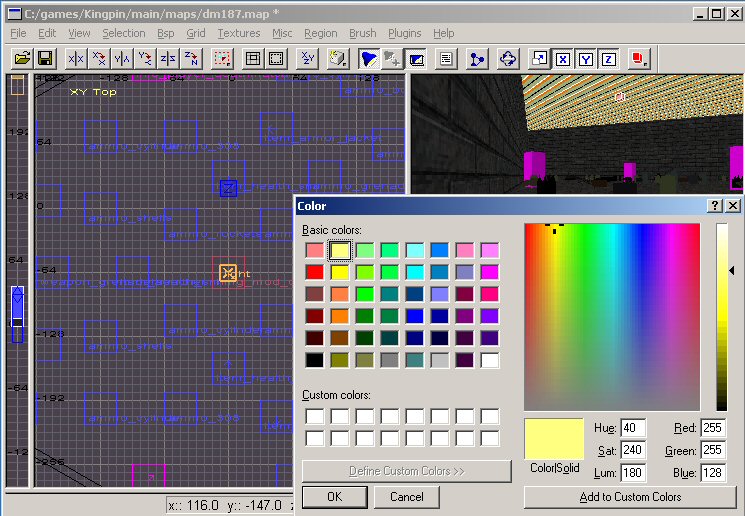
After i put a color to the light i unselected the light and put a junior also witht he entie right mouse. I place the junior a bit under the light but that is not needed you can place entities in each other so long you don't put entities in brushes. Only it a bit more handy to work with entitie if there not in each other. After i placed the junior a bit under the light i bring up the entity dialog up again with n. I fill at key: light and in value: 1000 and press enter. Junior almost always need the double size of value as light. Otherwise you won't see much about the junior. 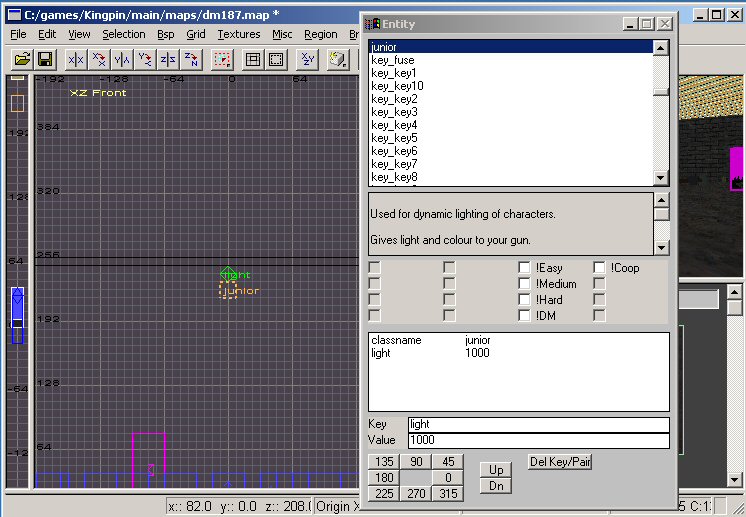
After i fill in the light value i bring down the entity dialog again with n. Now i want the junior have the same color as the light. So i bring up the color selection again and selected the same color and press the OK button. After unselecting the junior my map is basicly done. Only thing i want that it got a map name with my credits. So i selected a brush it doesn't really matter wot brush so long you will get the classname worldspawn. But i selected the ceiling becouse it fasted to choose. I press the n key to bring up the entity dialog. I fill at key: message and in vallue: dm187 by FREDZ and press enter. I press the n key again to close the entity dialog. 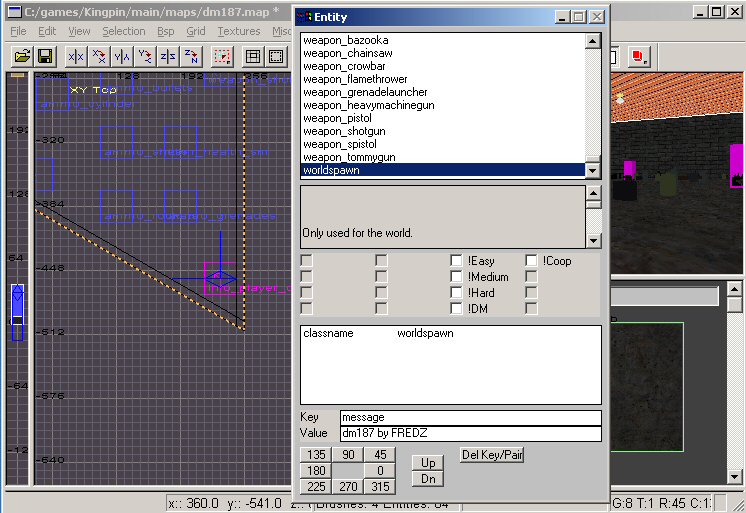
Time to save map. And the map is now done! Now it's time to compile map. It's not always possible to compile map directly (this depence on wot operating system youre using (think this only works on Windows 98)). Thats why there is a tutorial compiling youre first map. To compile youre map directly go to menu BSP|bsp_FullVis (qrad -extra). 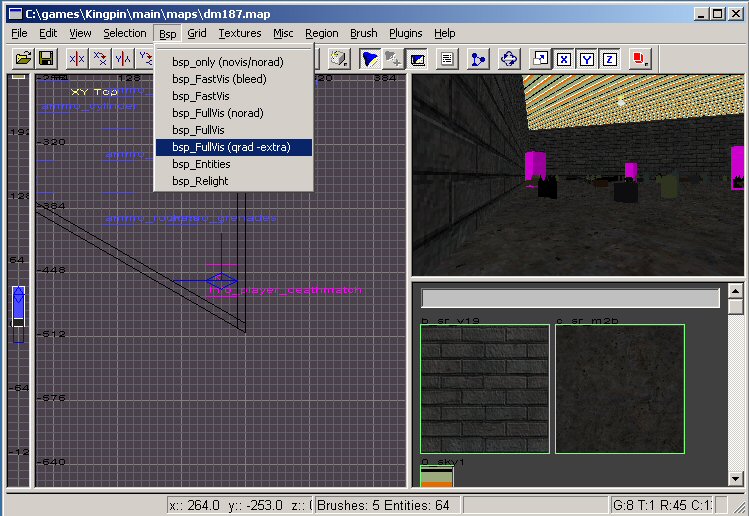
A popup box will popup and it will starts compiling youre map. 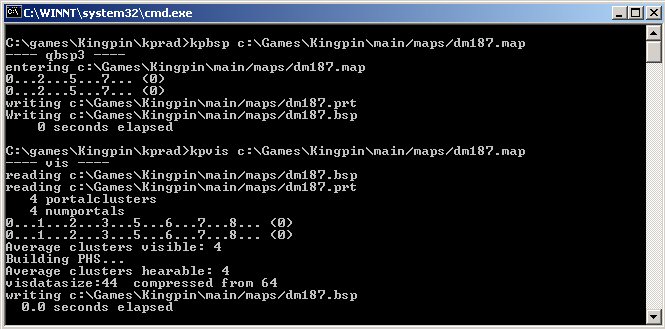
After the popup box is done you can start up youre map in Kingpin. Start Kingpin bring down console with the ~ key. type in console: deathmatch 1 "and press enter". type in console: map youremapname "and press enter" so in my map it's map dm187 Now you can see youre map. If you don't see youre map you could not compile youre map and should go to the next tutorial compiling youre first map. 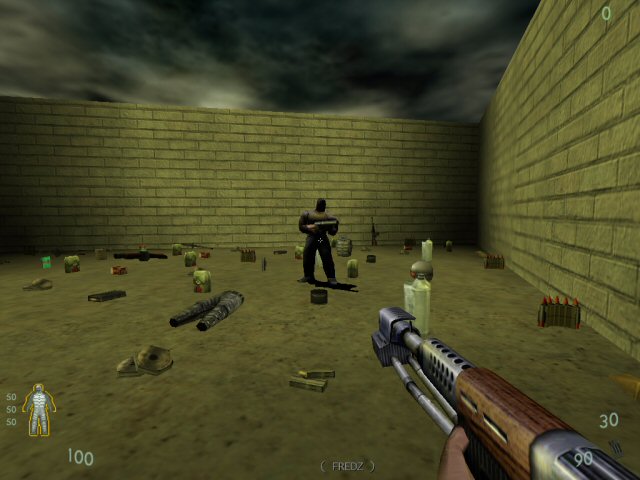
You can download here the map and the example: Map DM187. Just unzip it in youre Kingpin directory. If you got any question just press the Contact button on my website and send a email to me. |