Tuts > alpha
Alfa texture tutorial.
You will need photoshop for this tutorial
With Paint Shop Pro you can make a 2 colour Alfa channel, that
I am aware of you cannot make a grayscale channel
If you like to use PSP I recommend checking out this tut
here
First we start of with a 24 bit image
To make up a 24 bit image, it takes 3 colour "channels",
each are classed as 8bit's
red, green and blue channels (8+8+8=24)
Each channel(8 bits) allows 256 unique colour values.
With kingpin and TGA textures, we are allowed a 4th channel,
the Alfa channel
Its also an 8bit so it will become a 256 color grayscale. that's any colors range from black to white.
In game, the black areas are not drawn (seethrough/clear) and white is solid.
Since the 4th chanel is grayscale is (256 colours) its allows us
to make transparent looking tga's.
You may be lost by now so lets start editing
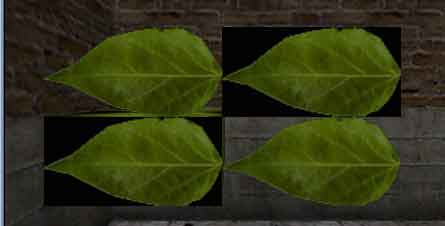
Here is the texture we will be
using in tutorial (its from a texture pack GIMP released)
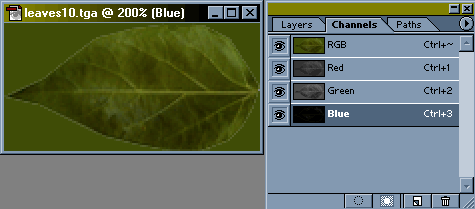
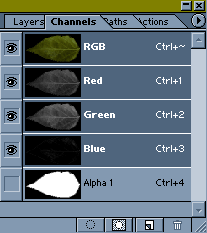
If you cannot see the channels window in photoshop go to menu Window-->Show Channels.
You can see the three channels, Red Green and Blue. The RGB is
what final picture looks like when saved.
We want to add another channel for transparency. Alfa channel. RGBA
To make a channel you will need to make a selection to define
the black and white colored areas.
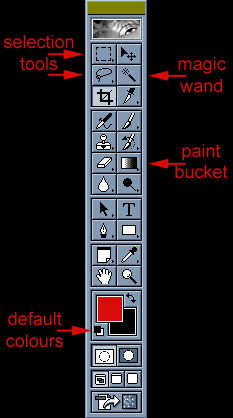
Use the magic wand tool to select the are to be hidden.
Set
'tolerance' to 1 if the color is solid. Increase if the edge is blurry or has noise.
'Contiguous' can be unchecked if the color around the object is unique.
![]()
|
Note: holding mouse1 on a tool (with little arrow on bottom right) As seen with the pain bucket hidden by the gradient tool. |
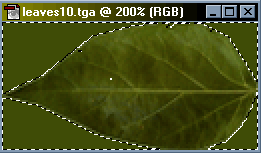 |
After that you may need to clean up selection a little. You can also use menu Select->Modify->Expand. This wil help remove the blended colors at the edge. |
|
I prefer to make the selection(background) black. This is because the edges around an alfa channels will bleed through. In game this image will show a green haze/ring effect around edges of the texture. To replace the green color with black, use the menu Edit-->Fill. |
Now to create the alpha channel we use the selected area.
First the selection needs to be inverted. Use menu Select-->Inverse (shortcut
shift+ctrl+i)
|
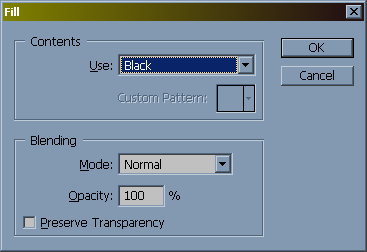
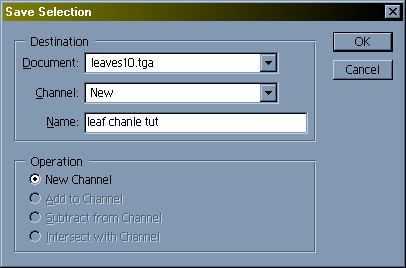
Now go to Select-->Save selection This dialog box will appear.You shouldent have to change anything, just click 'Ok'. |
|
You should now have 4 channels RGBA |
That's editing done.
|
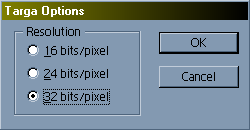
Now save the file. Menu File ->Save As.. Select a folder. eg.. kingpin/main/textures/newstuff/ Choose a 'File Name'. eg leaf_gimp_01.tga Select 'Format' Targa(TGA) Click the 'Save' button. In the popup choose 32 bits/pixes. |
Load up kpradiant, load your custom texture directory eg.. 'newstuff'
The new texture showld appear in the texture browser.
Apply your texture to a brush.
While the brush is selected, open
the surface inspector (shortcut key S) window and tick the 'alpha'
surface flag.
Compile map and go have a look
Alfa texture in game do not normaly display compiled lighting properly in kingpin.
You can darken the texture to compensate or make the brush a func_wall.
Func_wall adds to entity count so online play will be effected if you have to many.
To use a func_wall with an alpha textures you need to set spawnflags 32(SURFACE2_ALPHA) in the Entitie Inspector(shortcut N)
Make sure the Surface Inspector(shortcut S) flag 'alfa' is DESELECTED.
|
In editor |
 |
In game |