Creating and converting pallete in Gimp.
Kingpin uses some times textures that have a fixed palette of 256 colors. This is known as Indexed Mode in most image manipulation programs. To properly convert a texture you have as a jpg file to Kingpin pcx, tga format you will have to convert the file to Indexed Mode using the Kingpin palette. Let's now have a look at how to do that in the great and free image manipulation software GIMP.
Step 1: Importing the Kingpin palette into GIMP
You only need to do this once for your installation of GIMP.
The Kingpin palette is saved in the file main/pics/colormap.pcx of your Kingpin installation. If you do not have this file in that location you will have to extract if from main/pak0.pak with a tool like PakScape. If this is too annoying you can also grab the file here.
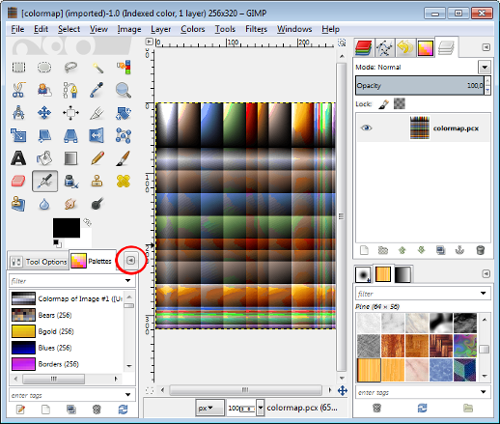
Now that you have the file it's time to import this palette into GIMP. Open GIMP and load the file colormap.pcx. Let's first make sure that you have the Palettes tab in your GIMP toolbox. If you do, your toolbox should look similar to this one:
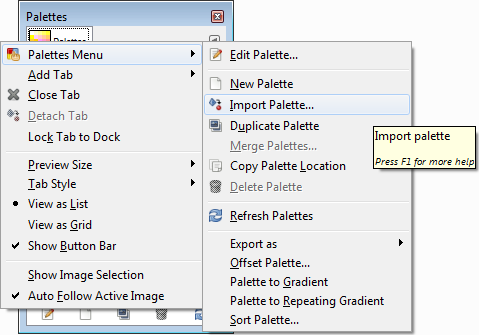
If you don't have the tab, add it now by pressing the small arrow marked with a red circle in the image above and clicking Add Tab > Palettes. Now that you have that tab, switch to it and press the small arrow again but this time click Palettes Menu > Import Palette...:

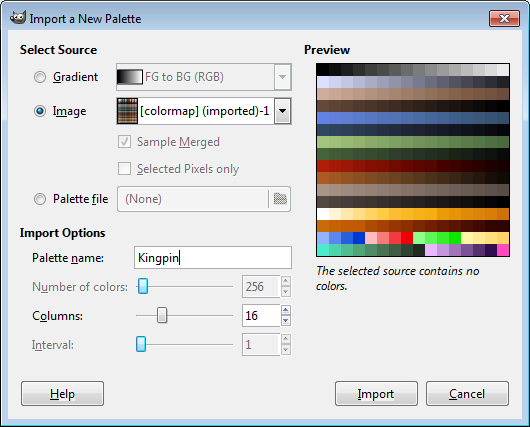
In the new window under Select source click Image. You can give the palette a better name, I named it Kingpin here:

Click Import and you're done.
Step 2: Converting an image with the Kingpin palette
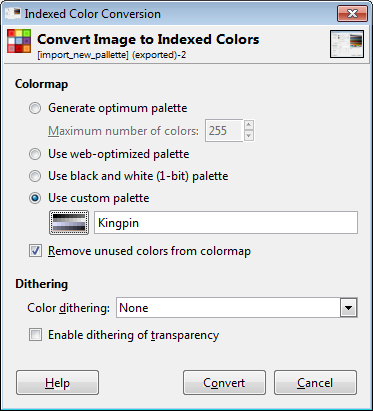
Open your first image in GIMP. Now click Image > Mode > Indexed.... In the new window under Colormap select Use custom palette. Then click on the tiny palette preview image and chose the Kingpin palette your imported in step 1. Uncheck the option Remove unused colors from colormap and click Convert

Save the image in pcx or tga (After you put it back in 32bit colors) format and you're done.


